Friday, October 31, 2014

How to make a Halloween Tag with MSD by: Aneta

Hello and happy Halloween my friends :)

Today I bring you a tag tutorial 
with Halloween as the main theme of course. 

This time the difficulty level is 2.

Here it is:


And here is a quick tutorial:

Step 1: gather your supplies.


Step 2: place your first layer of paper and a washi tape
and use some distress ink on the edges 
after gluing 


Step 3: place the second layer. 
Use Distress Tool on the edges after gluing


Step 4: continue adding layers.
Use Distress Tool on the edges.
Make a hole in the middle of your tag
for some ribbons.


Step 5: Use MSD stamps on the edges 


Step 6: ...and more stamping with MSD clear stamps.


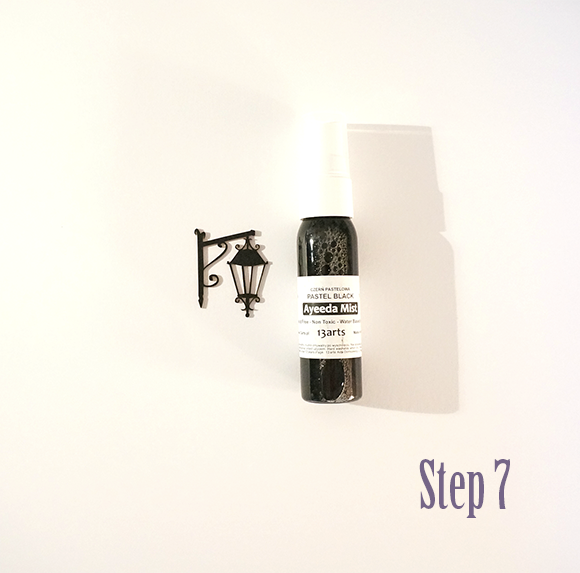
Step 7: Paint your chip board black.
I used some black mist.


Step 8: Continue adding your embellishments.
Use 3d foam for some 3d effect.


Step 9: Now I'm adding a metal flower.
Use some strong glue for this job.
Glue Dots are just perfect!


 Step 10: Last step is adding some Halloween ribbons
and flowers on top of your tag.


Supplies:

50 101008

50 101038 

50 100400

50 101058 50 101001 50 101060

And now let me announce the winner of our last challenge.
Thank you so much for playing along with me.
This was the second MSD challenge of many to come.

I hope you all had alot of fun.
Eleven amazing entries took part this time.
You can see them here
and the winner is.......
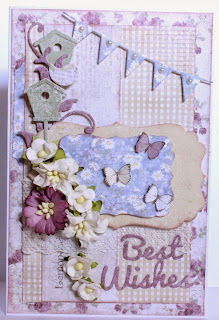


Congratulations!! Pop me an e-mail aneta@artisant.is
with all your shipping informations.


If you feel like checking out my previous tutorials

I hope you're ready to have some fun.
I've prepared the next challenge for you and I hope you'll like it.

The rules are very simple:

1. Use a color palette or a sketch below to start your TAG
 ( yes, we will make some tags this time :) ).
You can choose colors, sketch or both if you feel like it.


2. NO Marion Smith products required
but I would love to see some of your fantastic projects 
made with our fantastic products :)

3. When your project is ready just write a post on your blog 
and link it below. You'll find the tool in the end of this post
 (please add link directly to the post you want us to visit,
not to the entire blog)

4. This challenge is open until 26th of November.

5. Winner will be drawn out by the Random Numbers Generator
and announced 28th of November in my next: "HOW TO..." post.

And now our prize, sponsored by MSD and me:


Prize includes:
- 8 MSD tags
- 5 sheets 15x15 MSD papers
- 2 big pale yellow roses
- 6 small orange roses
- around 10 paper purple flowers
- 2 burlap mini tags 
- around 5m (together) of laces and ribbons
- 2 MSD resin roses
- 2 packages of MSD Metal Butterfies
- 1 mini glass vintage bottle 

I'll cover shipping costs of the main prize to the lucky winner :)

So, who is ready to be the lucky winner this time and have some crafty fun?

You'll find the linking on my blog :).

Thank you for visiting me and good luck everybody!
xoxo
Aneta

Thursday, October 30, 2014

Guest Artist Spotlight: Joanne Bain

Good morning everyone. 

Today we am showcasing another amazing talent, Joanne Bain from Australia! She was so gracious to share her amazing layout with us today and how could you not love that picture. 


I am Joanne Bain from Queensland, Australia. I am a very proud mother of 2 and I am happily married to my best friend and have been for 20 years. He is the best husband a girl could ask for and is very supportive of my paper crafting. Most of my inspiration for this craft comes from my wonderful family and friends and also the beautiful array of products that are now available. When I am not scrapbooking, I am kept busy with all activities involving raising a happy family and I like dabbling around with photography which is perfect as I always have something to scrap. 


We live in sunny Queensland Australia along with our 2 dogs and more pet birds then I can count. I have been a scrapbooker for 12 years since my daughter was the age of 3 and then 9 years ago along came the other special boy in my life my gorgeous son, many of my creations tend to feature them. From as far back as I can remember I was always doing some form of craft. I have sewed, crocheted, knitted, painted and scrapbooked throughout my teenage years without even knowing it….lol. However paper crafting is my absolute favourite of all crafts and I would have say I am slightly addicted. 


My preferred scrapping preference is 12 x 12 layouts and creating off the page/altered projects. I am not locked into a specific scrapping style, as I am happy to give anything a go but I would describe my style as structured with lots of layers, fussy cut paper cutting, detail and dimension.


I do love to embellish my pages with chipboard, flowers and bling but sometimes I just love to let the gorgeous patterned papers available take centre stage in my creations. I am at my happiest with my scissors and beautiful patterned papers that beg to be fussy cut to create layers and dimension for my creations.


You can visit Joanne below via any of her social media links and her blog. 

Thank you so much Joanne for sharing. 

Happy Thursday everyone!

Angela


Wednesday, October 29, 2014

Layout in a frame by Yasmin Tölche

Hello good people! It's Yasmin on the blog here at Marion Smith Designs today and I have a framed layout today I want to share with you!


This layout was made specially for a friend of mine. She wanted a special gift for her friend and I got the task of making it! 


I've used the beautiful "Nirvana Collection" for my layout. The background paper and the word phrases "Family" and "<3 This" is cut out from papers from that collection. Have you ever made something special like this for a friend? 

Here are the paper's I used: 


Thanks for stopping by today! 


Monday, October 27, 2014

Feeling the "LOVE" with "Mad Tea Party" and my stash

Hello All!

Keri Sallee here! Today I am excited to share with you a mixed media piece I recently made using Marion's Mad Tea Party paper, stamps and some yummy Junque and Gems.

For this piece, I decided to dig through my stash and use some things I have had for a while to use along side Marion's designs
.

You'll find in this piece:

Tim Holtz Grunge Board Flourish (does he even make grunge board anymore!? LOL)
Vintage Tattered Angels Colors
Pink Paislee Wooden Letters
Old Prima Flowers
Paper Studio Flowers (that I have had forever!)
An old Stampin' Up Large Block stamp I found at a garage sale

To make make my background, I used the "Rabbit Hole" paper from the Mad Tea Party collection. 


To achieve my the edging, I simple tore off all 4 corners of the 12x12 paper and used matte gel medium to adhere it to my 5x7 canvas board. Voila! You have instantly transferred Marion's cool distressed edge to a smaller format!

Here are a few closeups!


My title is made from Pink Paislee Letters that were painted with Tattered Angels Glazes. A heat tool makes the glaze bubble up and gives fun texture. I layered these on top of Prima and The Paper Studio flowers that were splattered with Tattered Angels and glammed up with pink Junque and Gems.


Here is a side view!


I used "Viva Pink" Tattered Angels Glimmer mist on my Harlequin Style Grunge Board Flourish from Tim Holtz and used my large diamond stamp in the background to reinforce my diamond pattern. 


Everything is better with more messy color, right!? I splattered Tattered Angels glazes and glimmer mists and allowed some of it to drip down. You can also see the edge of the canvas better here. :)

So there you go! I hope you enjoyed my super-feminine and super-messy piece today.

Have an awesome day!

XOXO,
KERI

Saturday, October 25, 2014

Garment District Tag by Erica Houghton

Hi! Today I’m sharing a tag I created using the Garment District Collection by Marion Smith Designs.


I started by cutting and layering several sheets of Garment District pattern paper.


I then added flowers and a sentiment.


Finally, I finished my tag off with a few more flowers and a pretty bow!


There you have it...in a few easy steps you can create the perfect gift tag!

Paper
Marion Smith Designs, Garment District


Embellishments
Prima Marketing & Recollections – flowers
Celebrate It – ribbon

Products
Tim Holtz – distress ink 

Thanks for joining me today!

Erica

Thursday, October 23, 2014

Tag from Scraps with Jelissa

Hello friends!

It's been a crazy, crazy week with both the boys and me sick. But I managed to make a really quick and simple mixed media tag with some gorgeous Marion Smith Designs products.


Many of us end up with odd-sized papers after projects and I like to keep those because you never know when they come in handy. So I managed to steal about 30 min of craft time and use up some of those scraps.

To make this tag, I used papers I have from the Up and Away sheet from the Nirvana collection, as well as some bits left from Mad Tea Party. I took the Up and Away sheet and adhered it onto a product packaging as a backing and trimmed for a tag shape. Next was to tear some strips off the Alice paper from Mad Tea Party and layer them. I also cut out the floral basket from the same piece of Alice paper and did more layering with a card stock doily and chipboard. 


The white cabbage rose resin from Junque and Gems. Love that they come in white so that I can paint them. A tip to share: the surface of this particular resin is very smooth and doesn't hold paint well, so I primed it with gesso before proceeding. After that, the 13arts matt paint and Silk Acrylic I used for coloring stayed on beautifully. I also tucked in a piece of diamond chipboard as the Alice paper in my layers had repeating diamond motifs. 


The floral basket which I fussy cut out, and you can see the repeating diamond motif which I borrowed from the Alice paper. 

That's all I have for you today. Thanks for dropping by and have a great weekend!

Marion Smith Products used:


 love,